Authentication
Connecting an app to Zapier starts with authentication. Users select an app they wish to use in their Zap, authenticating their account with that app to allow Zapier to access their data.
Zapier will have access to the account until the authorization expires, is revoked, or credentials are changed. Zapier will automatically refresh OAuth v2 and session authentications when refresh token functionality is enabled in the integration.
Once users authenticate an app account to Zapier, they can use any of that app’s triggers/actions in their Zaps without authenticating again. Users would authenticate another connection if they wish to use additional accounts from an app with Zapier, for example if they have a work and personal account in one app.
Zapier integration builders define how Zapier connects to your app to authenticate users, adding an API call where Zapier tests the account authentication.
All Zapier integrations that can access or add private data for users require authentication. The only apps that don’t require authentication include data feeds (such as news or weather updates) or utilities (such as file format conversion tools or public search engines). If you’re building an integration for any app that stores private data and requires an account to use, your integration will require authentication.
Zapier Supported Authentication Schemes
Zapier supports the following five authentication schemes in the Platform UI, each with their own settings:

Where possible, OAuth v2 authentication is the preferred scheme to simplify a user’s account connection and minimize set up time. During the authentication flow via Zapier, a familiar popup window appears from your app to select their account or log in, then verify the connection. This fits the flow most modern apps use for integration authentication.
API Key authentication is next best. Users must be able to obtain their API key from your app without human intervention. Your integration won’t be approved for publishing if your service requires users to email or call your team in order to receive an API key or access to your API.
Basic authentication, while acceptable, is the least appropriate authentication type to use for a third party service like Zapier, as users must type their account credentials directly into Zapier’s UI.
For more custom authentication schemes, switch to the Platform CLI.
How to Remove or Change Type of Authentication Scheme
You cannot change an integration’s authentication scheme directly. First, remove the existing integration’s authentication scheme, then add a new authentication scheme.
Note: You can only do this for a (new) integration version that has not yet been promoted and has less than 5 active users, since this will break connected accounts for the version. If an integration’s authentication scheme needs to be changed, clone a new major version and add the new authentication. Learn more
To remove a Zapier integration’s authentication scheme in the Platform UI, open the Authentication page. Click the gear icon beside the existing authentication scheme, click Delete, then confirm to remove the authentication.

Then add your app’s new authentication scheme to the Zapier integration instead.
Note: Again, to not break connected accounts, you can normally not migrate existing users’ Zaps and connected accounts to a new version that has a different authentication scheme. For public integrations that meet certain conditions, we can provide support to migrate connected accounts between authentication schemes. Learn more
Common Authentication Error Messages
When the test API call to verify users’ credentials is unsuccessful, an error message shows in the Test section of your Zapier integration. Zapier shows a simplified error message in the Response tab by default.

The original API response with the full error message is shown in the HTTP tab under Response Content.

The most common errors include:
404
The standard HTTP 404 Not Found error is commonly returned when:
- Test API endpoint URL is incorrect
- Test API call method is incorrect

Verify both the API endpoint URL and the call method (typically GET). Ensure both are set to what your API expects, then click the Save & Continue button, and click the Test Connected Account button again.
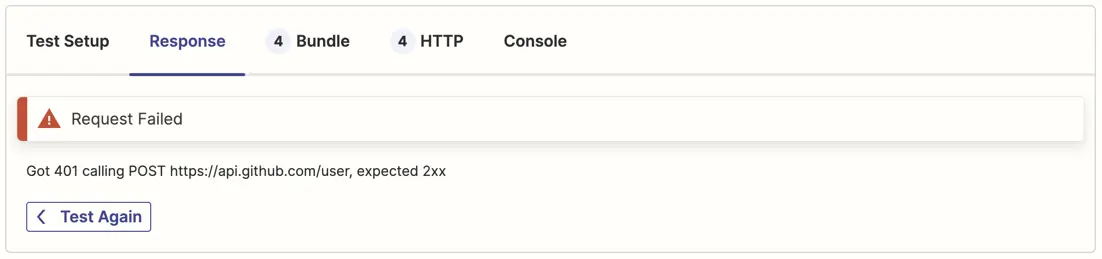
401 or 403
The standard HTTP 401 Unauthorized or HTTP 403 Forbidden error is commonly returned when:
- User account credentials are incorrect, expired, or revoked
Try authenticating your app user account with Zapier again. Click Connect an Account, add credentials for an active account on the app, then try the test again.
400
The standard HTTP 400 Bad Request error is often returned when:
- OAuth v2 Client ID and/or Secret are incorrect or expired
- Some other part of your request is malformed, particularly a token exchange request
Check the full error message from the error or Zapier’s testing logs to see if it lists why the call failed, then correct that part of your authentication flow. Verify each part of your authentication flow is entered correctly, including the request headers, URL parameters, and request body for each part of your authentication flow.

Error Parsing Response
The Error Parsing Response error is commonly returned when:
- API returns non-standard and especially non-JSON output
- Test API endpoint URL is incorrect

Verify the test API URL is entered correctly. If a normal webpage URL is entered in the test field, the site will return its raw HTML content to Zapier and that will likely result in this error. If you do change the URL, click Save & Continue, then test your connection again.
If your API call is correct and returning data in a format Zapier does not expect, you will need to switch to Code mode and add custom parsing for your API response. Under the Test API call in the top of your app’s Authentication settings, click Switch to Code Mode, then add custom JavaScript code to parse your API response.
Authentication Failed Task Timed Out
The Authentication Failed error, often including Task Timed Out, is commonly returned when:
- The API request does not return a response to Zapier within 30 seconds
- The API request is formatted incorrectly and the server does not respond with an error code
Check your Zapier test logs to see if it shows which URL timed out, then verify you’ve entered the correct URL in all of your integration authentication settings. Finally, check the API provider to see if their site or API are temporarily down.
If the request seems to be successful but the task still times out, your API call may be taking too long to respond, or could be returning more data than Zapier can parse within the time limit. Use a testing API call in authentication that returns as little data as possible, such as a /me call that returns the connected user’s account data. Or, if your API supports pagination and/or filtering, enable that and have the API return only the most recent result. Then test again to ensure the call works successfully.

500
The HTTP 500 error is the default, unformatted error that may be returned without specifying what went wrong or why. If you encounter this error, check the API endpoint URL that gave the error, and verify your API call is configured correctly with the expected URL params, HTTP headers, and Request Body.

Need help? Tell us about your problem and we’ll connect you with the right resource or contact support.
Was this page helpful?