Use Code Mode to refine your API call
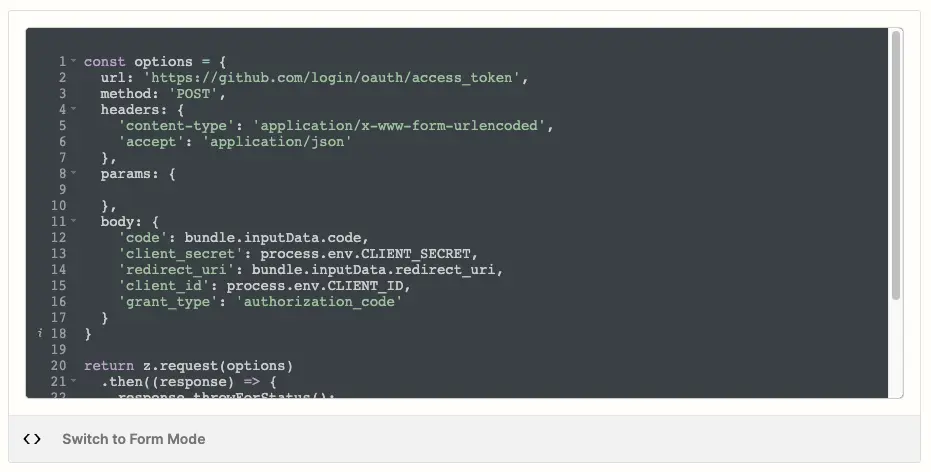
In the Platform UI, when building your authentication, triggers and actions, you will create each component of your integration using Form Mode. However if you need to add further customization to your API calls, you can use Code Mode.
You can use Code Mode to:
- Transform your API response into JSON format
- Add user authentication details and input form data to the API call
- Use ‘z’ object library to customize your API call
- Improve error response handling
Getting started with Code Mode
To use Code Mode, Zapier recommends for users to have an understanding of Javascript and making HTTP requests.
Code Mode is available to use in the API request settings:
- For authentications, Code Mode is in the Configure a Test Request & Connection Label setting. Note, for OAuth v2, Code Mode is in the OAuth v2 Endpoint Configuration setting.
- For triggers and actions, Code Mode is in the API Configuration setting.
Changes made in Code Mode are not saved automatically. Once you have added the code you want, click Save & Continue.
Capabilities of Code Mode
Use z object to customize your API call
You can write JavaScript code, using Zapier’s default code as a base or writing custom code. Use the z object for Zapier specific features, including z.console to write to the console log, z.JSON to parse JSON and z.errors to handle errors. Learn more in Zapier’s CLI Z Object docs.
Add user authentication details and input form data
You can use Zapier bundles to access authentication data, data from user input forms and request data. Learn more in Zapier data bundles.
Importing libraries
You can import from Node’s standard library with z.require, for example, z.require('querystring') or z.require('crypto'). Zapier strongly recommend you keep it simple when coding in Platform UI. Building and testing complex code is better suited with the Platform CLI.
NPM modules are not supported within the Platform UI. You’d need to export your project to Platform CLI and use npm to add additional libraries.
Performance considerations
Each trigger and action has a 30 second time limit. To ensure that Zaps run smoothly, keep your custom code as lightweight and efficient as possible. If your code takes longer than 30 seconds to run, it will time out and user’s Zaps will error. We also can’t guarantee that all imported libraries will be supported within our runtime environment.
Here are some specific things you can do to improve the performance of your custom code:
- Use efficient algorithms and data structures.
- Avoid unneccessary loops and recursions.
- Optimize your code for the specific task it is performing.
- Avoid using imported libraries that are not essential to triggers or actions.
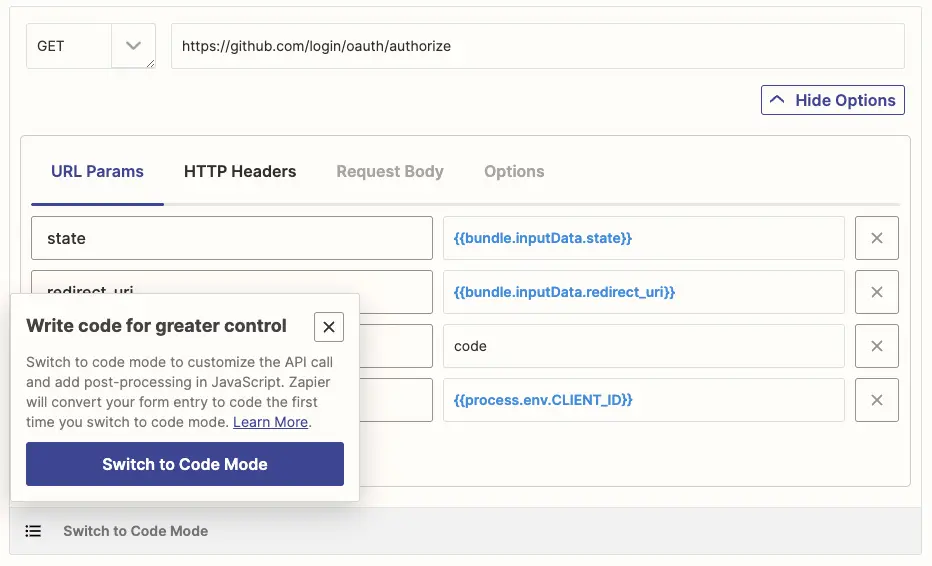
Switching between Form Mode to Code Mode
When you switch to Code Mode, Zapier uses your code when making API calls. Any previous settings from Form Mode will not be discarded. This is because Form Mode and Code Mode cannot be used together.
If you switch back to Form Mode, click Switch to Form Mode. Your previous Form Mode settings will be restored. Zapier will save the code you entered in Code Mode so you can use it again if you switch back to Code Mode.
Code Mode resources
Here are some resources that will be helpful when using the code mode:
HTTP Request Options
HTTP Response Object
HTTP Requests
Dynamic Dropdowns
Return Types
Bundle Object
Environment Variables
Placeholders vs Template Literals
Error Handling
Error Response Handling
Need help? Tell us about your problem and we’ll connect you with the right resource or contact support.
Was this page helpful?